Why Most Veterinarians Struggle with Equine Dentistry (And How to Fix It)
If you’re an veterinarian who has ever performed equine dentistry, chances are you’ve felt it: that familiar surge of frustration during a dental appointment. The horse is moving too much, the light is poor, and you find yourself struggling to see the back of the mouth, let alone confidently identify any subtle pathology.
You know, deep down, you could be doing better for your patients, but you walk away feeling like you didn’t quite nail it.
I have been there. I’ve seen thousands of veterinarians, from equine practitioners and ambulatory equine vets to practice owners and even equine surgeons experience the same thing. You feel like you’re not doing a good job, and sometimes that reflects gaps in setup rather than purely a lack of clinical knowledge.
The reason many veterinarians struggle with equine dentistry is often not just a knowledge problem. It’s also a setup, systems, and standards problem.
We often wrongly assume that the learning curve for a complex skill like dentistry is the primary hurdle. But based on two decades of teaching and mentoring, I can promise you that the biggest barrier to clinical confidence is almost always poor preparation.
You simply haven’t set yourself up for success – or your employer hasn’t set you up for success – with appropriate sedation protocols, the right equine dental equipment, or the right workflow.
This article is about identifying those critical gaps and outlining the non-negotiable standards that will change your relationship with equine dental practice immediately.
The Real Reason Dentistry Feels Hard
The struggle many veterinarians feel is completely valid. Dentistry often feels difficult, isolating, and frustrating.
But the difficulty isn’t usually the actual floating or the extraction; it’s the equine dental exam. If you can’t clearly visualise pathology, your ability to accurately diagnose it is significantly limited. The discomfort you feel is the confidence gap created by a failing clinical setup.
So what does that actually mean? When you are struggling with the horse moving, when you can’t get a clear view, and you feel like you are working in the dark, you are more likely to walk away from the case because you feel like you are not doing a good job.
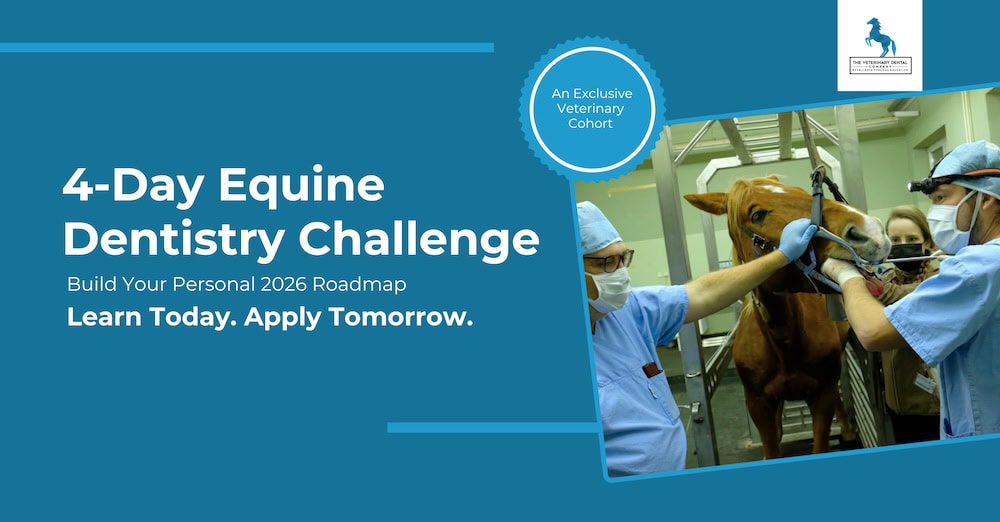
And as I’ve often pointed out in the recent 4-day Equine Dentistry Challenge, it’s often because the fundamentals of the setup weren’t addressed first.
The four pillars that determine your success are:
- Sedation: Is your horse calm and stable? Or are you fighting a partially sedated animal, introducing unnecessary risk and significantly compromising your diagnostic exam?
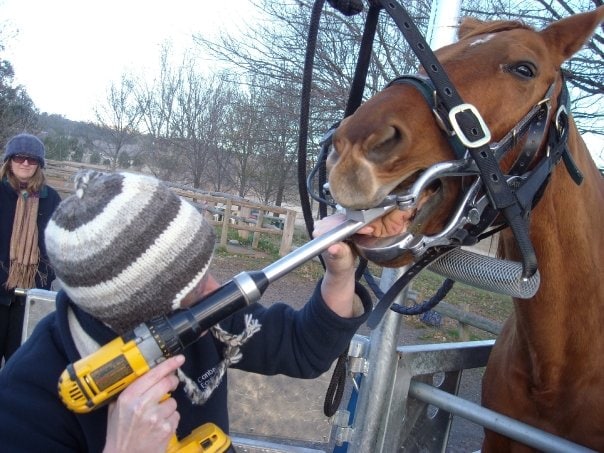
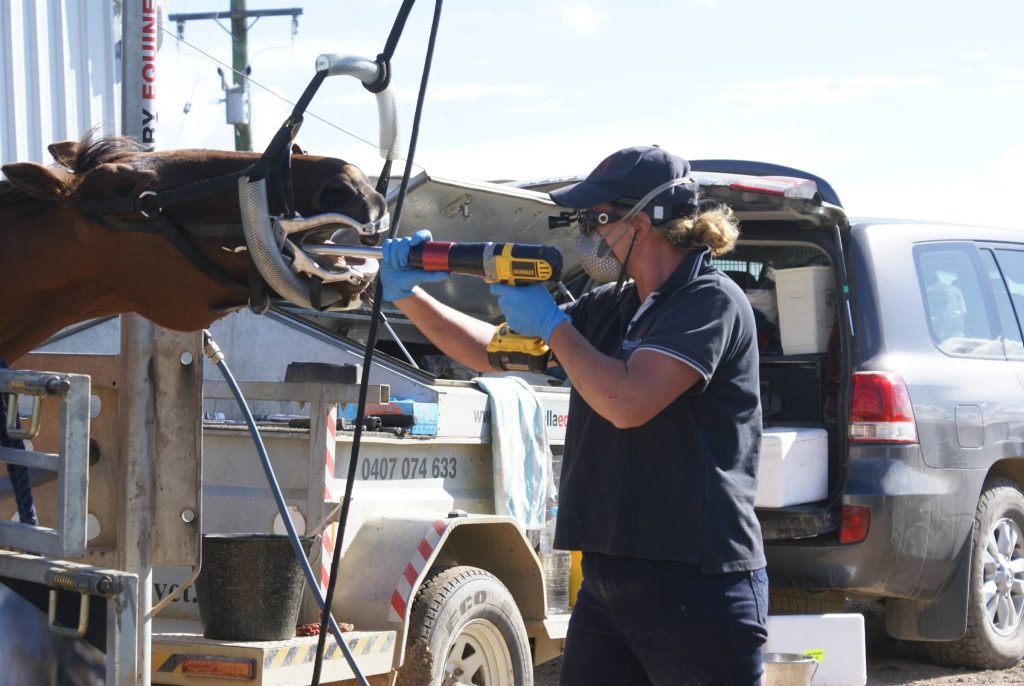
- Visualisation: Do you have strong, focal lighting and a clean, high-quality mirror/endoscope to see every surface? Or are you using a camping headlight and trying to diagnose pathology in the dark?
- Equipment Condition: Is your equine dental equipment clean, lubricated, and functioning perfectly? Or is it dirty, seizing up, and making your job harder than it needs to be?
- Workflow: Do you have a repeatable, step-by-step approach, or are you rushing through the steps to save time, missing key diagnostic moments?
You’re Not Set Up for Success
Let’s look at the two most common failures of setup that derail equine dentistry training and clinical confidence in the field.
1. Inadequate Lighting and Visualisation
If you cannot see, you cannot diagnose. It’s that simple.
I’ve seen many veterinarians try to perform a diagnostic equine dental exam using simple camping headlights, or even worse, with no light at all, using only palpation. This is a disaster waiting to happen. Camping headlights are not a focal light, they are not nearly strong enough, and you increase the risk of missing pathology if you rely on them.
Think about it: the reason so many veterinarians disliked dentistry when they were first starting out is because they were often trying to diagnose pathology in the dark.
How can you find a subtle pulp exposure, a small diastema, or early equine dental pathology if the mouth is murky and poorly lit? You can’t. Your equine dental setup needs to ensure a clean mouth and truly excellent, focal light.
2. Failure to Prioritise Clinical Standards
This is the centrepiece section, and it often requires an honest, uncomfortable look in the mirror.
Too often, I see veterinarians rocking up to farms with unclean equine dental instruments. This isn’t just about hygiene and infection control in a field setting; it’s about professional perception and clinical confidence.
When you open a dirty kit, it looks unprofessional to the client, and critically, it makes you feel less professional. That feeling immediately undermines your clinical authority when you need to have a difficult conversation about equine dental treatment acceptance.
Clean, well-maintained equipment is essential for building a professional and profitable equine dental practice.
The Overlooked Factor – Equipment Standards
I want you to think about what you have in your truck or dental kit right now. Go and have a look at your equipment. What needs to be cleaned? What needs to be greased? What needs to be wiped down?
Your equipment is a reflection of your clinical standards. Dirty, poorly maintained equipment doesn’t just look bad; it can make your workflow inefficient, increase the risk of mechanical failure, and add unnecessary stress.
Mechanisms seize up, batteries aren’t charged, and the lack of organisation costs you time – and time is money.
For me, it’s like my glove box. I know my life is getting a bit out of control if the glove box of my car is messy because I’m just putting all the stuff in there and shutting the lid so I can’t see it.
Your dental kit should not be a junkyard. It is where you store the tools that allow you to practice high-standard medicine.
Real Veterinarians Took Action
When I recently ran the 4-Day Equine Challenge, one of the first action steps I gave was to clean one area of your practice. The feedback was immediate. Small actions create incredible momentum.
- “I finally cleaned my dental halter after extraction work. I can’t believe I was using it that way.”
- “I charged all my batteries for the first time in months and organised my floating attachments.”
- “I cleaned the ratchets and mechanisms of my speculum – it opens so much smoother now.”
- “I finally took the rubbish out of my vet box and cleaned the blood off the plastic.”
These are not extraordinary feats. They are the baseline standards of a professional service. The sense of satisfaction that comes from completing a task – no matter how small – is the first step toward improving your clinical habits.
What Should You Actually Be Cleaning? (Checklist)
Make it a ritual. Consistency is key. Every time you leave the barn, think about the next step in hygiene and maintenance.
- Speculum: Focus on the ratchets, hinges, and all moving mechanisms. Dried food and biological debris are often trapped here, causing the speculum to seize up and increasing infection risk.
- Mechanical Floats (Powerfloat, HDE, Terrafloat etc): Clean the attachments, bits, and heads. Ensure the shaft is lubricated according to the manufacturer’s instructions.
- Light Sources: Wipe down all surfaces. If the exterior is dirty, the integrity of the seal may be compromised. Ensure batteries are charging between appointments.
- Endoscopy / Mirror: Ensure mirrors are stored safely and lenses are impeccably clean. You cannot diagnose subtle changes in the pulp or periodontal ligament through a smeary lens. Your mirror should have minor scratches (if it doesn’t then you aren’t using it enough), but major scratches and defects warrant a mirror replacement (just the mirror, not the whole instrument).
- Radiography Equipment: Wipe down the generator and digital plate after use. Debris and dirt can damage expensive plates and give you artefacts on your X-rays.
- Dental Halters and Ropes: These are often the dirtiest items. They should be regularly cleaned and, where appropriate, disinfected to reduce the risk of cross-contamination.
- Vet Vehicle/Truck Setup: Clean out your treatment drawers and the glove box. A clean, organised workspace, even in the field, reflects your professional mindset.
How Often Should You Clean It?
You need a clear, defensible standard, not a vague suggestion.
- After Every Procedure (Wipe Down): Immediate cleaning of gross contamination (blood, saliva, debris) on all instruments, the speculum, and the headrest.
- Weekly (Deep Clean/Sterilisation): Dedicated time for thorough cleaning, lubrication, and appropriate disinfection of equine dental instruments and attachments.
- Monthly (Maintenance Check): Dedicated time for an equipment audit. Check battery life, lubrication levels, generator cable integrity, and order replacement bits/supplies.
Small Actions → Big Momentum
The reason I encourage this focus on equine dental cleaning and equipment is because it’s the entry point to a higher standard of practice. It’s much cheaper to shop within your current client list and provide better service than it is to constantly seek new clients. The ability to provide that high-standard service begins with your setup.
If you struggle with the big, overwhelming goal of ‘improving my dentistry skill,’ start smaller. If you have a massive, messy desk, don’t think you have to clean the whole thing. Just do one portion of it.
Apply that same logic to your equine dental setup. Pick one item from the checklist and clean it today.
That small action builds confidence and momentum, preparing you for the more complex clinical challenges ahead, like mastering equine dental radiography or treating significant equine dental pathology like periodontal disease – one of the most common diseases affecting mammals.
The Difference Between Veterinarians Who Do Dentistry… and Those Who Avoid It
It is a learning curve to learn about equine dentistry. I can promise you that after teaching for over two decades now, seeing people come in not knowing anything and coming out the other side being confident is the best feeling. That confidence comes from knowing you have the right systems and setup to practice the highest possible standard of medicine.
The difference between the two groups of veterinarians – whether you’re an equine practitioner, ambulatory equine veterinarian, or veterinary practice owner – often comes down to this:
- Veterinarians Who Struggle: Focus on the procedure (the float), have a poor setup (lighting, sedation, dirty equine dental equipment), rely on the owner to report problems, and feel frustrated.
- Veterinarians Who Thrive: Focus on the diagnosis (pathology), have a meticulous setup (equine dental setup), use consistent, systematic equine dental exam protocols, and feel confident recommending necessary X-rays and advanced treatments.
If you are currently feeling stuck on the dentistry treadmill, your next step is not to read another journal article. It’s to do a full audit of your setup.
If you’re an equine veterinarian, practice owner, or equine dental practitioner looking for more structure around your setup, systems, and the clinical road map to advance your equine dentistry training, that’s exactly what we go through in more detail inside the training.
Simply click here to access the 4 training videos